Summertime is organization time

5 Teacher Organizational Tips For Summer

Back To School is less than a month away for most of us!  Here are some things you can do now to make 2019 BTS the best yet!

1. Organize your login/password info. for the million and one websites you use every day during the school year.

I use a manila folder to keep mine handy and organized.  I just write directly onto the folder and keep it in a drawer.  For those that I need a LOT like GoNoodle, United Streaming, etc. I make a little cheat sheet and keep it near my computer.  Click below to download a free template for logins and passwords.password sheets freebie

2. Organize your flash drives and/or Onedrive.

I recently found a great sale at Office Depot on 128GB flash drives for $19.99!   I was able to organize my school and home life in one afternoon!

If you have powerpoints or flipcharts that you use frequently; it’s a good idea to put them onto a flash drive that you keep in or near your computer at school.  Onedrive is awesome for keeping things safe and clutterfree but you know on the day of your “big” evaluation; the school wifi will go down for 15 minutes and you won’t be able to get to that great powerpoint or flipchart you had planned to use during your lesson.

My friend, Bernie, a fellow EIP teacher travels from classroom to classroom so she keeps a flashdrive with all her stuff on a keyfob in her pocket.  She always has what she needs right at the tip of her fingers!

3.  Organize papers.

Your paper needs will depend on what you teach but even in our digital world there is still a need for some paper.  Click here BTS printing checklist freebie for a free checklist of things you might need to print and organize for BTS.  You know the line for the copy machine will be out of control during preplanning and chances are the machine will either break down or run out of toner.  Get ahead of all of that now. If you can get into your school; it’s worth the price of a couple of reams of paper to go use the copier before everyone else does.  If you can’t use the copier at school; consider printing on your printer at home or finding a copy place that gives teacher discounts.

Organizing paper also includes printing, laminating and cutting out stuff you have bought for your classroom.  If you don’t have a way to laminate at least get everything printed and ready for the first day of preplanning.  For example, if you’re committed to using a word wall this year, you will want to get everything printed and cut out and ready because this is the kind of thing that can fall by the wayside once school starts and you have so many things to keep up with.  See my article about Word Walls here.

4.  Organize your personal daily storage.

Lunch bag, book bag, purse, keys, food… If something wasn’t working efficiently last year, now is the time to change it.  Go shopping for a new, more functional item.   I have this rolling bag that I love. Mine is just plain red, I’ve had it 5 or 6 years and it’s still great. Its so easy to pick up by the handles to put it in or take it out of the car and then pull up the long handle to roll.

Think about what irritated you last year and find a better solution.  I was always digging in my purse or bookbag for my car keys or my classroom keys.  So I bought 2 of these heavy duty snap clips and now I clip them to the sides of my purse and I never have a problem finding them.

Are you thinking about food prepping for breakfasts or lunches?  Now is the time to find the containers you want to use and try them out.

5. Organize your storage.

It’s time to make those bucket or crate stools you have pinned 500 pictures of on pinterest.  Just do it!  You will be amazed at how easy it is to organize your manipulatives and other teaching materials.  This is how I organized mine using bucket stools.  I made 6 bucket stools when I taught first grade (one for each math unit and also a good number to go around the reading table)  I printed a label for each bucket (Unit 1: Numbers and Counting, Unit 2:…) Then I stored the manipulatives I needed for each unit inside each bucket.  It worked great!  I knew everything I would need to teach a lesson, do a small group, or set up a center was in the bucket for that unit.  Now I’m an EIP teacher and I go to many different classrooms but I still use my buckets for storage and I can quickly and easily find materials I need to take with me to teach a lesson.

What do you do in the summer to get ready for Back to School?

Share your tips in the comments.

Field Trip Fun


My first grade team went on a great field trip today. I love it when you can have fun with your kids and meet standards at the same time. I teach in Georgia but we are only a little more than an hour’s drive from Greenville, South Carolina; home to The Children’s Museum of the Upstate. This interactive children’s museum is three floors of sciency fun!  It’s a perfect place to explore those co-requisite science standards that include Habits of Mind and the Nature of Science.  Students explore, observe and make connections about science concepts.  And it’s all so much fun!

The little guy in the seat next to me on the way home was determined NOT to fall asleep on the bus.  These pictures were taken over a total span of about 3 minutes.

5 things you will see in a standards based classroom

5 Things You Will See in a Standards-Based Classroom

I’ve been seeing these t-shirts on Pinterest that say “I teach children, not standards!”.  While I think I know what they mean by this; we also need to remember that it is a GOOD thing to teach the standards.  The standards are, after all, nothing more than a list of things that kids need to know and be able to do.   My t-shirt will say,  “I teach children all of the standards so they can be successful in school and in life”.  Ok, I might need to work on that.  Below are some things I have been working on to make my classroom standards-based.

  1. Activities are aligned to the VERB of the standard.  This one was a real eye-opener for me.  When I began writing units and really focusing on the verb of the standard, I was amazed at how often I looked at the “topic” and then picked activities related to that topic instead of focusing on exactly what the student needed to learn and be able to do.  For example,  when I taught plurals I spent a lot of time making sure they understood how to make a word plural, when to add -s or -es and how to sort singular and plural words.  However, the first grade standard says that students will be able to use singular and plural nouns with matching verbs.  So, although -s and -es, and being able to tell singular from plural was a prerequisite skill, my standard was directing me to teach students to use singular and plural nouns with matching verbs.    I have found it helpful to underline the verb of the standard when I am planning or writing materials because it helps me keep my focus on what I want students to be able to do.
  2. Student work on display reflects the standards.    The standard should be obvious when we see the student products.   Please don’t throw things at me, I’m not suggesting that we never do fun things just for the sake of fun.  Certainly not!  Young children need many experiences.  I think we should paint, work puzzles, and (dare I say it?) even play in the lower grades.  But when we see students actual work; it should reflect what they were meant to learn.    My friend, Sherri, hung some work in the hallway last week and the minute I saw it, I knew which standard she was teaching.  L3, “spell words with common spelling patterns”. (encoding)  Of course, since encoding and decoding are so closely related, she was probably touching on the standard RF3 also, “decode commonly spelled single syllable words”  The activity was a Build-A-Word of short a CVC words with the letters cut and pasted below each picture.  Were they “spelling with common spelling patterns”?  Yes!  We could see how they spelled them by cutting out each letter and pasting it in order beneath the picture.  She was using this product. short vowels
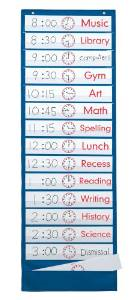
  3. Standards are displayed in a useful way.   Sometimes we teachers, get carried away with cutsey, artsy, displays.    For example, I once saw a classroom where the teacher had spent a lot of time cutting huge leaves (one for each standard) and then printed each standard and glued them onto the leaves.  Then she twisted butcher paper to make a “vine” that she wove around the top of her classroom walls, all 4 walls!  She attached the leaves to the vine and had all the standards up on her walls.   I saw another teacher who wrote two standards on the corner of her white board each day.  Which teacher was really using the standards?  Although the vine/leaf thing was attractive; it wasn’t functional.  She couldn’t point out the standards to the students and there were so many, they were nothing more than decoration.  I think sometimes we loose the focus of why we are doing what we do. Why display the standards?  So we can refer to them and show them to students.  So, lets put them in an easy to reach place and format.  I use a small pocket chart and slip kid-friendly standards into the pockets as I need them.  I use a pocket chart like this but instead of schedule cards, I use standards cards.pocket chartI bought the kid-friendly standards from Deanna Jump on TPT.  I bought the pocket chart on Amazon.
  4. Assessments are aligned to the standards.  Since I started teaching over 20 years ago, I have heard people say (with negative tone) “teaching the test”.  The thing is, we should be assessing what we teach.  What is the point of an assessment if not to check and see if students have learned what they needed to learn?    I think it’s important that we design our assessments to align with the standards.  How else can we know we have taught them effectively?
  5. Students know what they are learning and can dialogue about it.   In a standards-based classroom students are aware of their learning.   They know what they are “working” on.  It’s not a secret; it’s not a test.  We tell them what we want them to know.  We know that if they can talk about their learning, it will be more meaningful to them.  This is also how we get at those elusive Speaking an Listening standards, where students need to engage in conversation about grade level topics.

I would love to know what you’re doing in YOUR standards-based classroom.  Please share in the comments!

signature

5 Ways to Get Parents on Your Side


  1. Remind parents that you are on the same team. tn_t3 You care. You know you do but they don’t.  So tell them, show them, talk about it with them. Remind them that you are on the same team. Eliminate an “us” against “them” feeling.  Let them know you are working “with” them for their child.  Explain to them that your goal is to help their child.   It’s true and parents like to hear it.
  2. Point out the positive. tn_teacher It’s easy to fall into the teacher trap of trying to “fix” everything that is not working correctly.  But what about the things that are going great?  Make a point of letting parents know what their kids are doing well.  If the best thing you can say is “Johnny remembers to hang up his bookbag everyday without a reminder.” then say it.  Now that you’re looking for positives; make sure you have a system in place to manage them.  I keep a little clipboard with small preprinted “Sunshine Notes” on it.  A student list is taped to the back of the clipboard.  When I see a child doing something kind, or working especially hard, etc. I jot a quick “Johnny helped a friend during math today!” onto a Sunshine Note, check off Johnny’s name on the list, and drop it into the folder box to go home with Johnny.  It only takes a second and I can use my checklist to make sure I don’t inadvertently overlook someone. (I will post my Sunshine Notes as a freebie soon).
  3. Ask what you can do for their child…..and then follow up!  You can do this in conferences, notes or conversations in the car rider line.  I have enjoyed using a “Wish Box”  I saw on Pinterest a few years ago. At open house, I set out an empty container with the word “Wishes” on it and asked parents to write what they wished for their child for this year and drop it into the Wish Box.  One parent said “I wish for Susie to be loved.” so I made a point of writing in her folder occasionally how I loved the way she played, laughed, twirled her hair when she was reading……  Of course, I cared about little Susie, but I needed to make sure her parents knew that I did.  Another parent wrote “I wish for Sally to learn to read.”  so I made sure to send a little note every time Sally went up a level in guided reading.  It was something I was doing anyway, it kept the parents encouraged and it only took a moment to write a note or send an email.
  4. Make your newsletter a bragging post and say THANK YOU. tn_teac1 Whether your newsletter is a full page of detailed information or like mine, a half page full of bullet points and quick notes, you can use it as a way to make parents feel valued.  I always  put a thank you in the notes/reminders section of my newsletter.  “Thanks to Johnny’s mom for sending cupcakes for the Valentine’s party.”  “Thanks to Susie’s mom for sending us some Kleenex for our classroom.”  Not only do Johnny and Susie’s moms feel valued for their contribution but a bonus is that other moms will often jump on the bandwagon and the Kleenex and germ-x will flow into your room.  Win-win for everyone.
  5. Communicate often and be sincere.  tn_t2The more parents hear from you, the more vested they become in what’s going on in your classroom.  I’m not talking about bombarding them with typed and copied notes in the folders.  I’m talking about sincere communication and it doesn’t have to be too time consuming.  Remember you can:  email, text, write a note in a folder/agenda, call, catch them in the car rider line, or invite them in for a conference.  Do what you are comfortable with but do it often.  Little things can mean a lot.  If you have already shown a parent that you care about their child, you like their child, you have noticed positive things about their child and you appreciate them as parents;  then they will be more receptive if the need arises to have a difficult talk with them about their child’s behavior or learning.  Together you will be able to work with them to find a resolution to the problem because you have already created the feeling that you are a team working together for their child.