Back To School is less than a month away for most of us! Here are some things you can do now to make 2019 BTS the best yet!
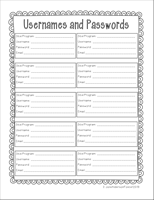
1. Organize your login/password info. for the million and one websites you use every day during the school year.
I use a manila folder to keep mine handy and organized. I just write directly onto the folder and keep it in a drawer. For those that I need a LOT like GoNoodle, United Streaming, etc. I make a little cheat sheet and keep it near my computer. Click below to download a free template for logins and passwords.password sheets freebie
2. Organize your flash drives and/or Onedrive.
I recently found a great sale at Office Depot on 128GB flash drives for $19.99! I was able to organize my school and home life in one afternoon!
If you have powerpoints or flipcharts that you use frequently; it’s a good idea to put them onto a flash drive that you keep in or near your computer at school. Onedrive is awesome for keeping things safe and clutterfree but you know on the day of your “big” evaluation; the school wifi will go down for 15 minutes and you won’t be able to get to that great powerpoint or flipchart you had planned to use during your lesson.
My friend, Bernie, a fellow EIP teacher travels from classroom to classroom so she keeps a flashdrive with all her stuff on a keyfob in her pocket. She always has what she needs right at the tip of her fingers!
3. Organize papers.
Your paper needs will depend on what you teach but even in our digital world there is still a need for some paper. Click here BTS printing checklist freebie for a free checklist of things you might need to print and organize for BTS. You know the line for the copy machine will be out of control during preplanning and chances are the machine will either break down or run out of toner. Get ahead of all of that now. If you can get into your school; it’s worth the price of a couple of reams of paper to go use the copier before everyone else does. If you can’t use the copier at school; consider printing on your printer at home or finding a copy place that gives teacher discounts.
Organizing paper also includes printing, laminating and cutting out stuff you have bought for your classroom. If you don’t have a way to laminate at least get everything printed and ready for the first day of preplanning. For example, if you’re committed to using a word wall this year, you will want to get everything printed and cut out and ready because this is the kind of thing that can fall by the wayside once school starts and you have so many things to keep up with. See my article about Word Walls here.
4. Organize your personal daily storage.
Lunch bag, book bag, purse, keys, food… If something wasn’t working efficiently last year, now is the time to change it. Go shopping for a new, more functional item. I have this rolling bag that I love. Mine is just plain red, I’ve had it 5 or 6 years and it’s still great. Its so easy to pick up by the handles to put it in or take it out of the car and then pull up the long handle to roll.
Think about what irritated you last year and find a better solution. I was always digging in my purse or bookbag for my car keys or my classroom keys. So I bought 2 of these heavy duty snap clips and now I clip them to the sides of my purse and I never have a problem finding them.
Are you thinking about food prepping for breakfasts or lunches? Now is the time to find the containers you want to use and try them out.
5. Organize your storage.
It’s time to make those bucket or crate stools you have pinned 500 pictures of on pinterest. Just do it! You will be amazed at how easy it is to organize your manipulatives and other teaching materials. This is how I organized mine using bucket stools. I made 6 bucket stools when I taught first grade (one for each math unit and also a good number to go around the reading table) I printed a label for each bucket (Unit 1: Numbers and Counting, Unit 2:…) Then I stored the manipulatives I needed for each unit inside each bucket. It worked great! I knew everything I would need to teach a lesson, do a small group, or set up a center was in the bucket for that unit. Now I’m an EIP teacher and I go to many different classrooms but I still use my buckets for storage and I can quickly and easily find materials I need to take with me to teach a lesson.
What do you do in the summer to get ready for Back to School?
Share your tips in the comments.
