Summertime is organization time

5 Teacher Organizational Tips For Summer

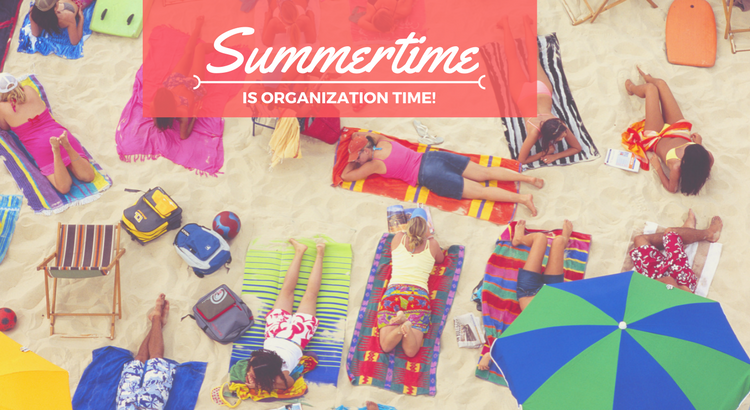
Back To School is less than a month away for most of us!  Here are some things you can do now to make 2019 BTS the best yet!

1. Organize your login/password info. for the million and one websites you use every day during the school year.

I use a manila folder to keep mine handy and organized.  I just write directly onto the folder and keep it in a drawer.  For those that I need a LOT like GoNoodle, United Streaming, etc. I make a little cheat sheet and keep it near my computer.  Click below to download a free template for logins and passwords.password sheets freebie

2. Organize your flash drives and/or Onedrive.

I recently found a great sale at Office Depot on 128GB flash drives for $19.99!   I was able to organize my school and home life in one afternoon!

If you have powerpoints or flipcharts that you use frequently; it’s a good idea to put them onto a flash drive that you keep in or near your computer at school.  Onedrive is awesome for keeping things safe and clutterfree but you know on the day of your “big” evaluation; the school wifi will go down for 15 minutes and you won’t be able to get to that great powerpoint or flipchart you had planned to use during your lesson.

My friend, Bernie, a fellow EIP teacher travels from classroom to classroom so she keeps a flashdrive with all her stuff on a keyfob in her pocket.  She always has what she needs right at the tip of her fingers!

3.  Organize papers.

Your paper needs will depend on what you teach but even in our digital world there is still a need for some paper.  Click here BTS printing checklist freebie for a free checklist of things you might need to print and organize for BTS.  You know the line for the copy machine will be out of control during preplanning and chances are the machine will either break down or run out of toner.  Get ahead of all of that now. If you can get into your school; it’s worth the price of a couple of reams of paper to go use the copier before everyone else does.  If you can’t use the copier at school; consider printing on your printer at home or finding a copy place that gives teacher discounts.

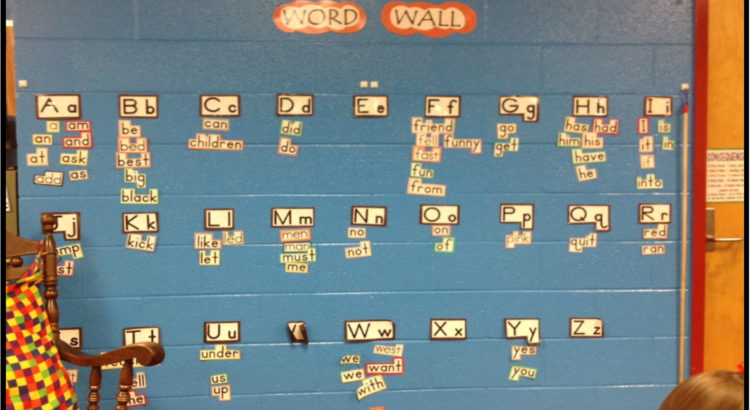
Organizing paper also includes printing, laminating and cutting out stuff you have bought for your classroom.  If you don’t have a way to laminate at least get everything printed and ready for the first day of preplanning.  For example, if you’re committed to using a word wall this year, you will want to get everything printed and cut out and ready because this is the kind of thing that can fall by the wayside once school starts and you have so many things to keep up with.  See my article about Word Walls here.

4.  Organize your personal daily storage.

Lunch bag, book bag, purse, keys, food… If something wasn’t working efficiently last year, now is the time to change it.  Go shopping for a new, more functional item.   I have this rolling bag that I love. Mine is just plain red, I’ve had it 5 or 6 years and it’s still great. Its so easy to pick up by the handles to put it in or take it out of the car and then pull up the long handle to roll.

Think about what irritated you last year and find a better solution.  I was always digging in my purse or bookbag for my car keys or my classroom keys.  So I bought 2 of these heavy duty snap clips and now I clip them to the sides of my purse and I never have a problem finding them.

Are you thinking about food prepping for breakfasts or lunches?  Now is the time to find the containers you want to use and try them out.

5. Organize your storage.

It’s time to make those bucket or crate stools you have pinned 500 pictures of on pinterest.  Just do it!  You will be amazed at how easy it is to organize your manipulatives and other teaching materials.  This is how I organized mine using bucket stools.  I made 6 bucket stools when I taught first grade (one for each math unit and also a good number to go around the reading table)  I printed a label for each bucket (Unit 1: Numbers and Counting, Unit 2:…) Then I stored the manipulatives I needed for each unit inside each bucket.  It worked great!  I knew everything I would need to teach a lesson, do a small group, or set up a center was in the bucket for that unit.  Now I’m an EIP teacher and I go to many different classrooms but I still use my buckets for storage and I can quickly and easily find materials I need to take with me to teach a lesson.

What do you do in the summer to get ready for Back to School?

Share your tips in the comments.

Do’s and Don’ts for Word Walls

Thinking about creating a word wall?
Wanting to use your word wall more effectively?
Not sure how to use a word wall?

Every elementary classroom should have one.  Read on to learn how to use yours effectively.

8 Do’s  for Word Walls

  1. Do put it where students can reach all words
  2. Do begin with a blank word wall
  3. Do add words as you work on them
  4. Do interact with the wall daily
  5. Do teach students to use it as a resource for writing
  6. Do pull words off to create sentences
  7. Do let students “teach” using pointers and slappers
  8. Do have fun with it

8 Don’ts for Word Walls

  1. Don’t put it near the ceiling
  2. Don’t put up all the words before the 1st day
  3. Don’t put up words without students
  4. Don’t ignore the word wall
  5. Don’t forget about the word wall
  6. Don’t treat it like a decoration
  7. Don’t forbid students to touch it
  8. Don’t be afraid to use it

Let’s talk about Word Walls!  I have been teaching long enough to remember when Word Walls were something new.  They were originally part of a program called “4 Blocks” by Patricia Cunningham.  I remember getting the training and    being excited about using a Word Wall in my classroom.  Since then they have become a mainstream component of elementary classrooms.  Unfortunately, not everyone is using them to their full advantage.  With very little effort, a Word Wall can be a powerful tool for student learning.

I have provided you with a quick list of Do’s and Don’ts for Word Walls.  Let’s dig a little deeper into the Do’s and look at how to use the walls effectively.

  1. Do put it where students can reach all words

Dedicate a wall in your classroom.  I have taught in many sizes and shapes of rooms too so I know it can be a challenge  because of activboards, doors, windows, computer hookups, etc.  However, there is always one wall that can be used.  A large bulletin board can work too.  For the wall to be effective, students need to be able to see it, touch it and get up close to it.  If you look closely at this picture you will see that some of the lower letters are not crisp and smooth because they have been touched and rubbed against as students worked around the word wall.  A Word Wall is a tool it is not going to stay clean and neat all the time. And that’s okay!

       2. Do begin with a blank Word Wall

It’s tempting to go ahead and put it all up during preplanning.  Don’t do it!  Put up the labels and if parents question you during open house tell them “We will put up the words together in class as a learning activity!”  Here is a picture of a little sweetie (clipart mask hides her true identity;) on the first or second day of school.  Notice the blank Word Wall behind her.

 3. Do add words as you work on them

Incorporate sight words into your ELA lesson.  It’s a standard and you are going to cover it anyway so be systematic about it.  In kindergarten, teach a word, put it on the word wall and then practice writing it and using it in sentences.  In first grade, put up the kindergarten “popcorn” words quickly in the first few days and then add others each week or as needed.  In second grade, the first three Dolch lists will go up quickly because they should have been learned in first grade.  You might focus more on adding math and science words as you learn them.  But leave the sight words up there, many students will need them for spelling in their writing throughout second grade.

  1. Do interact with the wall daily

Use the Word Wall everyday.  Some days you might conduct an entire lesson using the Word Wall.  Other days, it might just be a sponge activity while students are washing hands for lunch.

  1. Do teach students to use it as a resource for writing

“Teacher, how do you spell…..?”  The spelling issue can fatally disrupt the writing process for many students.  By teaching them to use the Word Wall (and accompanying personal dictionary; if you like…) you can eliminate many of  these problems.  Students enjoy being independent and the process of looking for and finding the word on the Word Wall and then writing it is conducive to long term memory storage.  Win. Win.

  1. Do pull words off to create sentences

Physically pulling the words off the Word Wall to create sentences helps students experience the meaning of each individual part and see how they work together as a whole.  Best practice; ask students to pull the words off and see what they can do!  I will never forget little Jose who after a similar lesson in my first grade classroom, used the Word Wall to write the sentence “I like my teacher.”  It was the first sentence he had ever written!  He cut it out of his journal and gave it to me.  I still have it taped to my pencil holder.  That was just the beginning for little Jose and many others who were energized by the power to create meaning with words!

  1. Do let students “teach” using pointers and slappers

I allow students to use pointers and slappers during whole class work with the Word Wall but I also have the Word Wall as a center during literacy centers.  I have to model this at the beginning of the year, but it is always a favorite with my students.  Here is a picture of a sassy little teacher going to town.  See the feet of her “student” in the rocking chair to the left.  Both students are engaged and learning.

Consider this: when a child says “Let me see..” they always hold their hands out to touch the thing they want to see.  We “see” things better when we touch them.  Allow your students to touch the words and the pointers and fully experience the Word Wall.

*a slapper is a flyswatter used to slap words. It’s very fun:)

  1. Do have fun with it                                                                                      Sing the words, dance while you read them.  Have fun!  Want more ideas for ways to have fun with a Word Wall?  Stay tuned for an upcoming product called Fun With Word Walls.  Follow me on https://www.teacherspayteachers.com/Store/Julie-Alderson-Foster to receive notifications when I post new products!
Here are some products that will make putting up and using a Word Wall as simple as pie!

                                                     Word Wall Words    

                                                       Pirate Word Wall 

                                                     Polka Dot Word Wall

                                               Elmer Inspired Word Wall

                                                      Personal Dictionary

Nutella Truffles

#TeachersKnowWhatTeachersLike

No, I haven’t decided to turn this into a cooking blog. LOL!   The Nutella Truffles are the teacher gifts my daughter is giving to her teachers for Christmas.  Rockdale County, where I teach, got out on Friday but the county we live in goes until this Thursday so I was in the unique position of actually having time to do something special for AnaBeth’s teachers.

The recipe is below if you would like to try them:)

Happy Holidays!

Julie


Nutella Truffles  (makes about 30 good sized truffles)

1 cup Nutella

1/2 cup crushed vanilla wafers

1/2 cup confectioners sugar

Mix thoroughly and add vanilla extract (about 1 – 1.5tsp) until ingredients bind well

Will be slightly dry.  If it’s too dry to roll, you can add a few drops of vegetable oil

Rub butter on your {clean} hands and roll into 1″ balls

Immediately roll in crushed hazelnuts (the butter from your hands helps the nuts stick)

That’s it!  Doesn’t need refrigerating because there is no cream.

Enjoy!